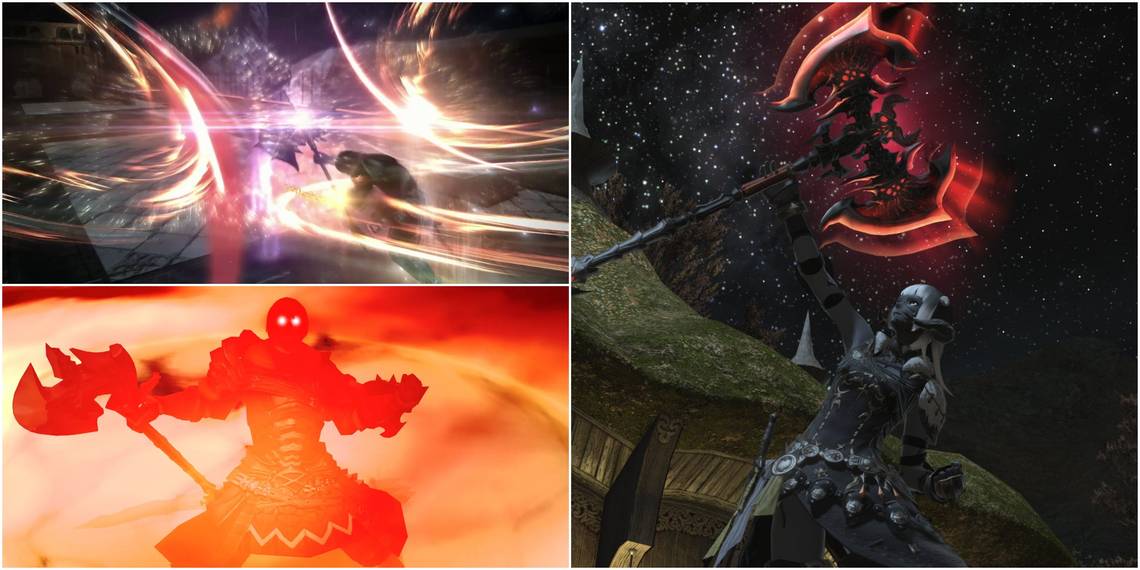
With their mighty greataxe and excellent self-healing capabilities, the Warrior is one of the most overpowered jobs in Final Fantasy 14. From soloing parts of raids to protecting their teammates from fatal attacks, the Warrior can handle almost anything thrown their way, making them one of, if not the best Tanks in the game.
Furthermore, the Warrior can build up and exhaust their Beast Gauge to unleash devastating attacks onto their targets, dealing excessive amounts of damage. The Warrior's kit and unique abilities allow it to shine in practically every situation, making it an excellent choice for anyone looking to pick up a new role or job.
Updated September 27, 2022, by Seth Parmer: Patch 6.21 has been issued to bring balance changes to the boss' HP of the Eight Circle (Savage) encounter and some Jobs. The Warrior is one of the Jobs that received a slight tweak, so we have updated this guide to reflect that. You can find new Openers, an updated Best in Slot, and more!
Wielding The Greataxe

While it would be excellent to be able to start off as a Warrior, you -unfortunately- have to go through a prerequisite class. However, the good news is this class is the Marauder and is one of the many starting classes available in the game, allowing you to kick your journey off in Limsa Lominsa on the path of becoming a Warrior.
Though, if you do not pick the Marauder as your starting class, you can unlock it by heading to Limsa Lominsa Upper Decks and speaking to Blauthota (X:11.0, Y:6.3) to receive the quest "Way of the Marauder" and complete it to become the class. From here, you will have to reach Level 30 to specialize into the Warrior Job.
Becoming A Warrior
After achieving Level 30 as a Marauder, you can finally become a Warrior! For this, head back to Limsa Lominsa Upper Decks and speak with Wyrnzoen (X:11, Y:6) and start the quest "Pride and Duty (Will Take You From the Mountain)." Complete this quest to unlock the Soul of the Warrior soul crystal to become the job. Additionally, if you need more detail on how to unlock the job (or any of the others), please feel free to check out our complete job/class unlocking guide here!
From this point onward, you will have to reach Level 90 to get the most out of the Warrior. This can take lots of time and effort and can be tedious at times, especially if it's an alt-job. To speed the process up, follow our leveling guide!
Rotations

Since the Warrior has the ability to dish out large amounts of damage and heal themselves with several actions, they can stand their ground in almost any situation thrown their way. Additionally, since they're a Tank, they won't have to line up positional attacks for optimum damage. They will primarily stay locked in front of their target at all times. Below are the basic rotations of the Warrior that you will use quite often in every encounter. Note that these do not go over any Off-GCD Actions, as we will cover that later on in the guide!
Basic Single-Target Rotation
- Heavy Swing > Maim > Storm's Path
- Heavy Swing > Maim > Storm's Eye
Finishing the rotation with Storm's Path will increase your Beast Gauge and restore some of your health. However, ending with Storm's Eye will increase your Beast Gauge and provide extra damage.
Basic AoE Rotation
- Overpower > Mythril Tempest
Increases your Beast Gauge and damage dealt while hitting multiple targets.
Off-GCD Actions

With the Warrior's rotations outlined, we will now cover the essential Off-GCD Actions you will use in almost every encounter. The following actions are used throughout your Opener and will help you utilize the Warrior's kit to its fullest, allowing you to become nearly unstoppable on the battlefield if implemented correctly.
| Action | Recast Time | Information |
|---|---|---|
| Defiance | 3s | Your generated enmity increases significantly. Using the action again ends the effect of Defiance. |
| Infuriate | 60s | Your Beast Gauge increases by 50 points. Nascent Chaos is granted for 30s. Infuriate has two charges. |
| Inner Release | 60s | You gain three stacks of Inner Release, allowing you to perform Fell Cleave or Decimate without any cost. Fell Cleave and Decimate are guaranteed to be direct and critical hits. Inner Strength is granted for 15s. Inner Strength nullifies the effects of Bind, Heavy, Sleep, Stun, and most Draw-in and Knockback effects. Surging Tempest is also extended by 10s, maxing out at 60s. Primal Rend Ready is also granted to you for 30s. |
| Upheaval | 30s | Attack with a potency of 360. Recast timer is shared with the ability Orogeny. |
| Onslaught | 30s | Attack with a potency of 150 after charging your target. Onslaught has three charges but cannot be used if you're bound. |
| Thrill of Battle | 90s | Your maximum HP is increased by 20 percent, and you also recover 20 percent of your health. Potency of self-healing actions are increased by 20 percent for 10s. |
| Equilibrium | 60s | A self-heal with a cure potency of 1,200. You will also gradually gain 200 HP back over the span of 15s. |
| Vengeance | 120s | Incoming damage is reduced by 30 percent, and you attack with a potency of 55 anytime you receive physical damage for 15s. |
| Rampart | 90s | Incoming damage is reduced by 20 percent for 20s. |
Opener

Now that the Rotation and Off-GCD Actions are covered, it's time we pair them together to create an optimized Opener for the Warrior. Openers are not only excellent for dealing large bursts of damage at the start of an encounter, but they also allow you to manage your cooldowns and abilities much more efficiently. To make things less messy, we have placed every Off-GCD Action in parentheses and bolded them to make them easier to spot amongst the other actions.
Standard Opener
- (Pre-Pull) (Defiance + Sprint)
- Tomahawk (Infuriate) > Heavy Swing > Maim (Grade 7 Tincture of Strength) > Storm's Eye (Inner Release) > Inner Chaos (Upheaval + Onslaught) > Primal Rend (Infuriate) > Inner Chaos (Onslaught) > Fell Cleave (Onslaught) > Fell Cleave > Fell Cleave > Heavy Swing > Maim > Storm's Path > Fell Cleave (Infuriate) > Inner Chaos
Inner Chaos, Inner Release, Inner Chaos Opener
- (Pre-Pull) (Defiance + Sprint)
- Tomahawk (Infuriate) > Heavy Swing > Maim (Grade 7 Tincture of Strength) > Storm's Eye > Inner Chaos (Upheaval + Inner Release) > Primal Rend (Onslaught) > Fell Cleave (Onslaught) > Fell Cleave (Infuriate) > Inner Chaos > Heavy Swing > Maim > Storm's Path > Fell Cleave (Infuriate) > Inner Chaos > Heavy Swing > Maim (Upheaval) > Storm's Eye
Inner Chaos, Inner Chaos, Inner Release Opener
- (Pre-Pull) (Defiance + Sprint)
- Tomahawk (Infuriate) > Heavy Swing > Maim (Grade 7 Tincture of Strength) > Storm's Eye > Inner Chaos (Upheaval + Infuriate) > Inner Chaos (Inner Release + Onslaught) > Primal Rend (Onslaught) > Fell Cleave (Onslaught) > Fell Cleave > Fell Cleave > Heavy Swing > Maim > Storm's Path > Fell Cleave (Infuriate) > Inner Chaos > Heavy Swing > Maim (Upheaval) > Storm's Eye
Equipment And Materia Management

Finally, one of the most crucial aspects of getting the most out of your job is to learn how to manage your Equipment and Materia. While you can get by a large chunk of what Final Fantasy 14 has to offer with the bare-minimum gear requirements, you will have to come prepared in the game's more challenging offerings. Understanding Materia, how to use it, and what to pair it with can be more confusing than you might think, making people brush it off until they no longer can, leading to mediocre performance and build optimization. However, below is an example of a Level 90 Warrior with the "Best In Slot" for gear and Materia pairing. If you have yet to achieve Level 90, you can still see which stats we focused on bumping up via Materia to base your build around.
| Equipment | Materia | Stats | |
|---|---|---|---|
| Weapon | Windswept Battleaxe |
|
|
| Head | Rinascita Helm of Fending |
|
|
| Body | Rinascita Cuirass of Fending |
|
|
| Hands | Lunar Envoy's Gloves of Fending |
|
|
| Legs | Rinascita Poleyns of Fending |
|
|
| Feet | Rinascita Sabatons of Fending |
|
|
| Earrings | Rinascita Earrings of Fending |
|
|
| Necklace | Rinascita Necklace of Fending |
|
|
| Bracelets | Purgatory Amulet of Fending |
|
|
| Left Ring | Rinascita Ring of Fending |
|
|
| Right Ring | Lunar Envoy's Ring of Fending |
|
|
If you're still looking to make the overpowered Warrior even stronger, there are a couple of options you can implement to receive significant stat boosts that will help you out tremendously in encounters. First, as touched on in the Opener, consuming a Grade 7 Tincture of Strength at the beginning of your combo will give you a nice buff for the remainder of the Opener, allowing you to get more out of it. Lastly, eating food before diving into an activity is an easy way to get additional juice with little to no effort. Since the Warrior is a Tank, we recommend chowing down on some Carrot Pudding for the best results!


